Home Giveaways About Me Best Of PR
Showing posts with label DIY. Show all posts

Tuesday, March 19, 2013

DIY: "The Very Hungry Caterpillar Day" activities & inspiration


I realize I'm getting this out just in the nick of time, so if you can't get everything ready for tomorrow, the first day of Spring, when The Very Hungry Caterpillar Day official occurs, plan to celebrate this weekend! You might be surprised though, how many things you already have around your house that you can throw together for a momentous day tomorrow.

Food
Create your own line of snacks that are as close to the food in the book as possible. Use a straw to poke holes in the food. Don't forget your lettuce leaf at the end! Source: The Masked Mommy


You can also recreate pictures from the book using healthy food! Source: It's Our Long Story


Sensory Tub
Throw in anything related to the book that you can find, and maybe a few other things to fill in that theme along colors or textures, too! The items included in the one shown below are dyed green rice, colored large bottle tops, colored craft sticks, cardboard tubes with shiny tape wrapped around for pouring, neon plastic shot glasses for scooping, coloured cotton reels, coloured pom poms, wooden fruit, cakes, ice creams and other food items from the story, a few real clementines for a real sensory experience, a Very Hungry Caterpillar butterfly toy (a caterpillar would be a fabulous addition too!), and a copy of the book. Source: The Inspiration Tree


DIY Felt Book
I found this unbelievably adorable and FREE felt book instructions so your little one can have a quiet book experience of The Very Hungry Caterpillar! Included are printable templates for you to follow when cutting your felt. Source: Lavender's Blue Designs


Activities
Target: small motor, colors, sequencing, math.
Instructions: Cut out 1 apple, 2 pears, 3 plums, 4 strawberries and 5 oranges out of felt. I hand drew my own stencils out of cardstock, but you can also use stencils or find free clip art online to help you with the shapes. Punch a hole through the center of each felt fruit. As you read The Very Hungry Caterpillar, have your child lace the felt fruit onto the green “caterpillar” pipe cleaner in order of them appearing in the book. Review the colors of the fruit with your child. Source: See Vanessa Craft


Target: Listening/word assimilation, motor skills, object recognition.
Instructions: Print and cut out the printables in the link (click on photo). Glue to sticks of some sort, and allow your child to choose the correct object to hold up when you get to that point in the story. You can create a story board with this by having foam blocks or an upside down egg carton for your child to stick the sticks into when you get to that point in the story, creating a visual timeline of the story when done.
Printables are from: Make It Cozee


Target: motor skills, colors, math, science
Instructions: Create a butterfly life cycle. First, look at photos/pictures of a butterfly life cycle (easy to find online), and then make your own by drawing, gluing pictures to a plate and adding arrows, or making a 3-D one like the photo below. Directions for making the one below can be found at: Classified: Mom


Games
For a huge, and I mean HUGE supply of printables, games (dominos, bingo, snakes & ladders, etc. all with "The Very Hungry Caterpillar" theme), activities, booklets, and MORE, visit English Teaching Worksheets!

Wednesday, May 30, 2012

DIY: T-Shirt Scarf in 11 Steps

 Step 1: gather old t-shirts


Step 2: cut off the hem of the t-shirt


Step 3: cut t-shirt horizontally into 1" strips from bottom of shirt until you reach the armpits


Step 4: Cut off sleeves


Step 5: cut off the hem of the sleeves
 

Step 6: Taking all of the hems, make one cut in each so that you now have a strip of fabric instead of a ring. Then, cut the strips into 5" long pieces
 

Step 7: Take one t-shirt ring, and stretch it out so that it goes from looking like the top strip to looking like the bottom strip


Step 8: take the now stretched out t-shirt loop and wrap it around your hand (the palm part) and slide it off so that your fabric loop is now stacked in a circle.


Step 9: repeat steps 7 and 8 with all of the t-shirt loops


Step 10:  using one of the 5" strips of hem fabric, tie two of the t-shirt loop stacks together.


Step 11: repeat step 10 until your scarf is the length you want it!


All done! Wear it proudly, you look both classy and fun in this scarf. :) This is also a great way to make a t-shirt garland for special occasions--and it's so easy to clean because all you have to do is throw it in the wash!


Wednesday, August 25, 2010

FREE 20-Page Hardcover Custom Photo Book

Picaboo is offering a FREE 20-Page Hardcover Custom Photo Book through the end of August. You do have to pay shipping, but this is a $39.99 value! I haven't finished making mine yet, but you download this easy program that helps you make the book. It's fast, customizable, and pretty darn good looking. :-) I'm extremely excited about this because it's a GREAT Christmas gift for the Grandparents that most of us wouldn't be able to afford otherwise!

Visit http://www.Picaboo.com and enter the code "FREEBK" at checkout.

Since I haven't got mine ordered yet, let me know if you use this and how it works for you!

Sunday, April 25, 2010

DIY: Frugal and Green Centerpieces for a Baby Shower

Easy, green, and frugal baby shower centerpieces:

Step One: Obtain Bottles
I was able to snag a bunch of used Dr. Brown bottles for just the cost of shipping through http://www.diaperswappers.com/. BPA free, in good shape, and less than $2.00 a bottle! I told the mama-to-be about them so she could take it off of her registry as they'll be a gift to her after they serve their decorative purpose at the shower.

Step Two: Ribbon
Tie a reusable ribbon around the bottle's neck. Instead of buying new ribbon, I just used the same ribbon that had been tied around the washcloth/reusable wipe roses I received from I Dream In Green.


Step Three: Stuff with Tissue Paper
This is a great thing to do with your already used tissue paper that's wrinkly and has holes or tears. Just take one piece and start stuffing it into the bottom of the bottle until you have about 1/4 of it left sticking out of the top.

Step Four: the topper
Lastly, stick a topper of your choice down into the bottle and tissue paper. I was able to find these circular exploding decorations on sale for 90% off after Christmas last year. I bought 8 of them and tucked them away in my gift closet (I buy things on discount throughout the year and store them in a cupboard until I use them). The great thing about them is that they cost me $.40 each and are so colorful that I'll be able to reuse them for any sort of party or shower event that needs decorations!

If you can't find some inexpensive topper like this, you could use balloons on sticks or weighted down from a string, big old fashioned lolipops, or cute animal silhouettes (think: Peeps) cut out of scrapbooking paper and mounted on a dowel craft rod.

Wednesday, December 2, 2009

How to Make A Ring Sling

Interested in sewing your own Ring Sling? Retailing for anywhere between $30-$130, making your own can be a great way to save money and make sure you get what you want! I initially began making ring slings as a way to save money for myself, and fell so much in love that this is now a popular baby shower gift that I give. Follow these free photo and written instructions to make your own! Comments and suggestions are welcome. :-)
Photo Instructions for Making a Ring Sling
Measure the baby-wearer from the right shoulder to the left hip. Triple this measurement and add 8 inches to find how much fabric you'll need. Buy two complimentary fabrics in this length. So if I'm 22"...
22 x 3 = 66

66 + 8 = 74" of fabric needed


Wash, dry, and iron your fabric.


Trim the width of both pieces to 33" (or 22" for a preemie sling)


Sew the fabrics wrong right sides together on both long sides and also one of the short ends.


Turn fabric right side out (it should make a big sleeping bag).


Iron the fabric around the edges so that it lays flat, then sew 1/2" along both long ends and the short end that you already sewed together. This will keep the fabric from rolling into itself.


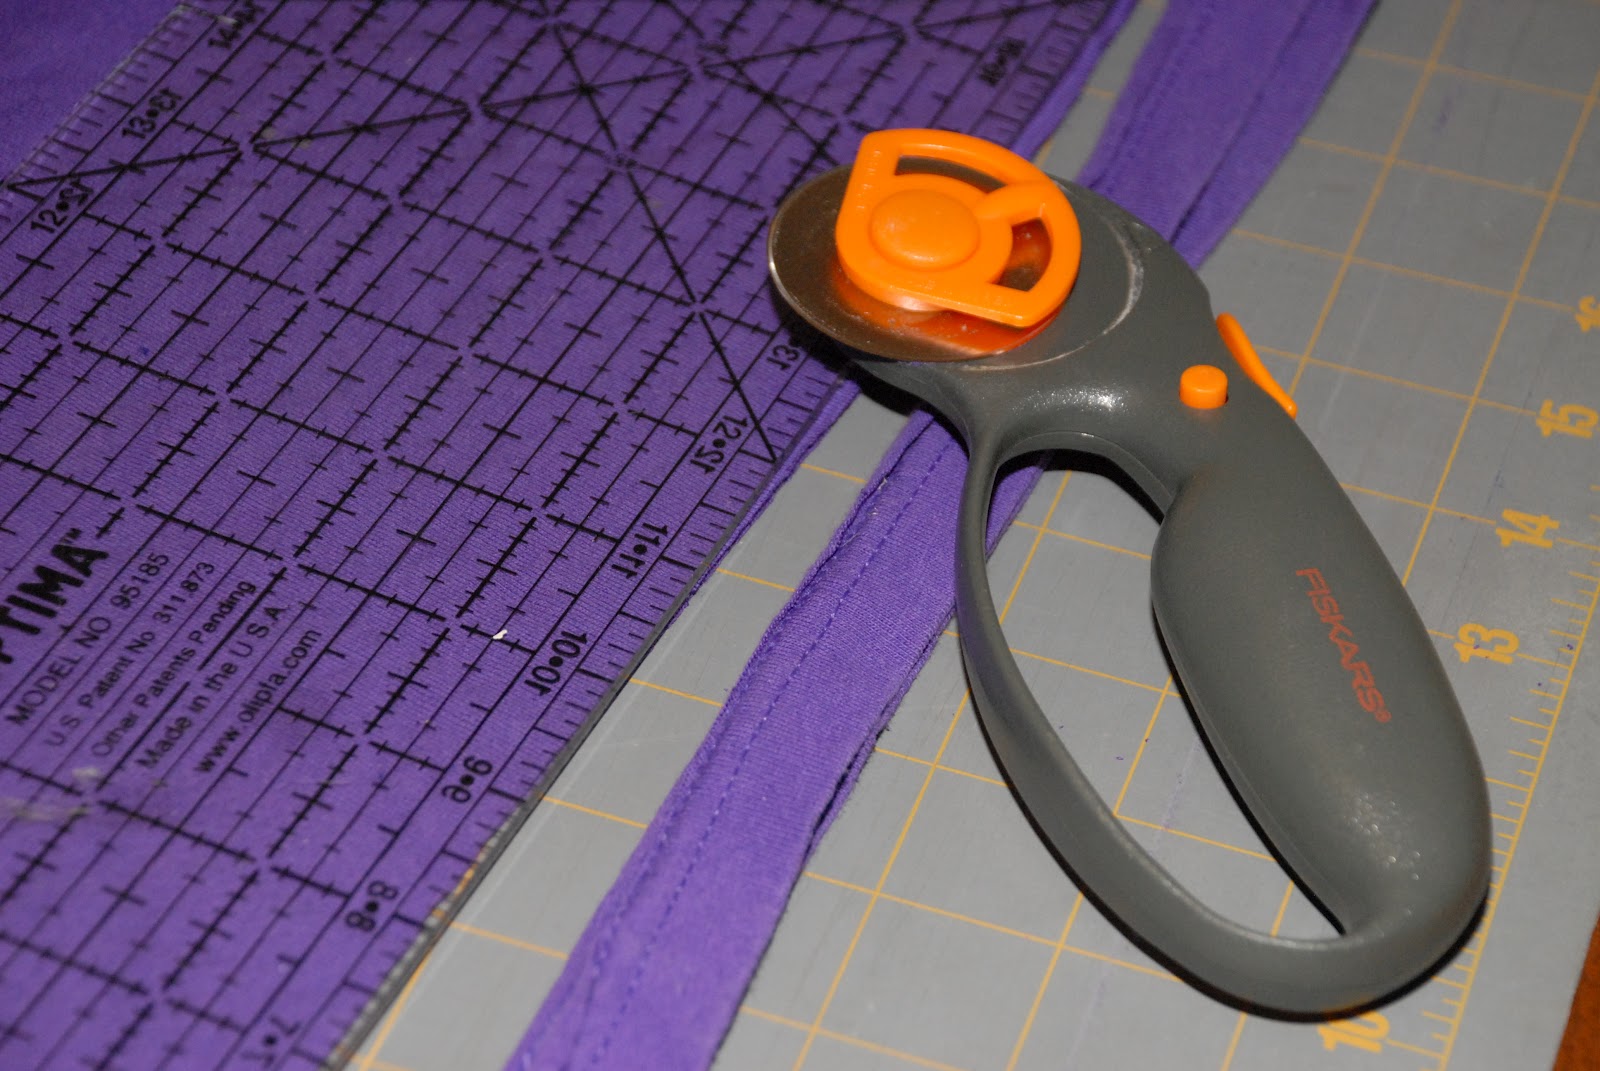
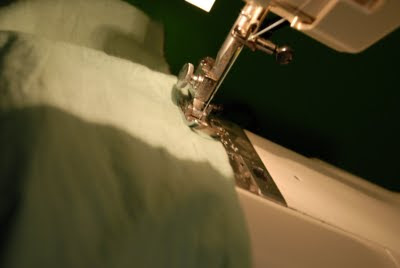
Now comes the tricky part. Be sure to take your time with this part or you'll be in trouble!


Fold the unhemmed short edge of the fabric down 1/2" and iron. I like to fold down the "outside" fabric, as shown below.


Fold the same part of the fabric you're already working with down 5" and press.


Open the 5" fold and place both rings with the left hand corner of the fabric inside.


Fold the corner through the rings so that the 1/2" pressed line meets the 5" pressed line.


Ever so carefully, stitch a few inches at a time of the 1/2" pressed edge to the 5" edge.
Note: I reinforced both ends of my stitching with a backstitch to add more security.


Keep matching the pressed edges and sewing.

The finished product should look like this:


You're finished! Check the length of your sling, fold up and stitch into place any excess. This can either form a pocket or just add a nice thicker tail that's great for wiping up any messes. I also like the contrast it creates to have the opposite fabric against the front fabric.


A note about materials used in making a Ring Sling:
I suggest only using fabrics that are 100% of a particular material. Mixed fibers tend to stretch more (do NOT buy a stretchy fabric as it will not be safe!), and are also less fire resistant.
The rings that I use to make my slings are purchased from www.slingrings.com. They have undergone rigorous safety testing and come in a variety of beautiful colors. One can use aluminum or nylon rings, but I will only use the metal kind as I have more faith in them and like to use as little plastic as possible anyway. The great thing about Sling Rings is that the colors won't wear off, and they're safe for babies to chew on, too! Don't purchase rings from craft stores--you won't know how safe they are or are not.
When choosing the appropriate sized ring to make your sling, I recommend using the "medium" size from Sling Rings. I've used both the small size for a single fabric sling, and the medium ones for a double fabric sling such as what these instructions are for. The medium size is more comfortable, provides security, and allows for easy adjusting.
A big thanks to www.slingmemommy.com ! They are where I first found directions to make my ring sling. The directions in this tutorial are based off of theirs which can be located for free on their website.