Home Giveaways About Me Best Of PR
Showing posts with label Tips. Show all posts

Thursday, January 15, 2015

How To Get Your House In Order In Only 5 Simple Steps (for REAL people)


Let's face it--we all want a clean house. Having a clutter filled home has actually been linked to depression for women, is scientifically bad for those with adrenal fatigue, and makes us all feel yucky. Inadequate. Overwhelemed. Irritated. You know, yucky. The bigger problem, is that while there are great ideas out there, like Fly Lady's system, and good intentions, like that superstar blogger mom who has 14 children and a Pinterest worthy house, these aren't helpful for real people. People who don't have time for a lengthy system and who don't have older kids to help with the younger ones. I need to know how to do this now, and by myself, because as much as I hate to admit it, I can't get my kids to do enough around the house that it's actually helpful to me. (there. I admitted it. I have a chore chart that no one follows. You're welcome.) I also have no mother's helper, I'm gonna lose my mind if I have to wait for my husband to get home for me to start cleaning, and I refuse to stay up until 3am to sweep my floors (I'm 30. Sleep is the new "fun".).

So here it is, folks. Here is how to get your house in order without shining your sinks, making it a "goal" to get dressed every day (seriously, just get dressed), and without any photos of my gorgeous home (that you know you'll never achieve) (actually, my home is achievable).

1) Have a bonfire. Burn everything that doesn't serve a purpose. (real deal: eliminate, eliminate, eliminate! If you don't believe me, bag up a bunch of stuff and see if anyone really needs it within the next three months. They won't. Donate, giveaway, or throw out. Sell only if you truly have the time, otherwise you know it's just going to continue to sit.)

2) Get a dog. Consider her a robot vacuum. (real deal: clean as you go. Sweep after meals, wipe the bathroom sink out with your washcloth after you wash your face, throw your dirty clothes in the hamper instead of on the floor, 

3) Mary Poppins. Study and become that woman! (real deal: make things easier on yourself. Get a steam mop, a washer and dryer, a mother's helper if you can afford one, paper towels (sometimes sanity outweighs the need to be Green, it's true), stop folding your underwear, and start using pretty bins for whatever toys and books you have left.)

4) Giveaway the dishwasher. Whatever enables you has to go. (real deal: whatever enables you has to go. Yup. That dishwasher that allows you to let dishes sit, both dirty, and clean? How much time do you spend rinsing, putting in, taking out, etc.? If you only have a sink and limited counter space, you'll get the dishes washed after almost every meal. This also means you won't need as many dishes. Which starts the cycle again of you making sure you get them clean. See how motivating this is? It applies to laundry, too--only have as many clothes as you need, and you'll be getting the laundry done a lot faster.)

5) Invite people over. Weekly in-law desert nights are on the agenda. (real deal: this works, and you know it!)

Wednesday, January 7, 2015

Top 5 Easy Tricks To Make Food Your Medicine

We are all familiar with basic foods that help our immune system and help us fight disease, but did you know that you might not be using those foods correctly to release their maximum potential? Here are my Top 5 Easy Tricks to maximize the healing benefits of what you're probably already using:


  1. Garlic: Smash your raw garlic, then let it sit in the open air for 15 minutes before using it in your cooking. This will help activate and preserve the disease fighting enzymes so they aren't destroyed as much in cooking.
  2. Tumeric: When using tumeric, always use black pepper as well. The black pepper will increase the bioavailability of the tumeric so that your body can actually benefit from it!
  3. Herbal Tea: To extract as many active ingredients as possible from a cup of tea, cover it while letting it steep.
  4. Herbs: When possible, use fresh herbs instead of dry ones. You then eliminate the possibility of an herb having lost its potency.
  5. Broth: For broths, make your own bone broth whenever you accumulate enough chicken or beef bones, divide into 1 cup portions, and freeze in individual baggies. When someone is sick, just pull a bag out and defrost! SO much more nutritious and beneficial than store bought broth, and this makes it super easy to have on hand.

Tuesday, March 26, 2013

Tips for Being Productive At Home


One thing that many moms struggle with is utilizing their time while at home. This doesn't just apply to stay at home moms, either! Often, we know that this is a problem but we don't know where to even begin in a way that will actually improve the situation. Fortunately, you can improve your own productivity and thus reduce your stress by staying focused on a few simple things that will make a big impact on yoru day. Print these out and post them where you can easily see them throughout the day.

Before doing anything else, ask yourself this question to see if you should even include what you're doing in your schedule:
Does this benefit myself or my family? Does this harm anyone? Am I intrinsically fulfilled by doing this? Does doing this in the way that I am and the amount of time I spend on it a true reflection of what I value and who I want to be?
Once you have established how you should approach the actions that make up your day by answering the above questions, then you can begin to apply the following rules to help yourself be more productive.
  • Set a limit on your screen time. This means Facebook, Blogging, TV watching, texting, surfing the web, and checking email. Don't trick yourself by thinking that your searching for deals online is exempt from this rule! What used to be chatting on the phone for our own moms when they were raising us has now become playing games on our smart phones and getting into debates on Facebook, or even gossiping in online message board forums for us. Find a number that is reasonable (whether 20 minutes or an hour), and stick to it. Get a timer!
  • Make a menu. These are easy to do, don't take a ton of time, and can be saved to reuse in the following weeks or months. You can make these weekly or monthly, and you'll find that it'll reduce your grocery bill, the amount of food you waste, and make you feel way more on top of your home management!
  • Rest. It's important to find time to rejuvinate yourself, whether it's by getting a good night's sleep, reading a book, working out, or meditating. This will not only improve your mood, but also your productivity!
  • Make a chore schedule. Include who's laundry gets done on what days (don't forget towels, sheets, and diapers!), the "daily" chores like sweeping and dishes, as well as the "monthly" chores like mopping and scrubbing the bathtub. Even better, put checkboxes on it so you can track and be motivated by your accomplishments. Include your children on this chore chart to help instill a good work ethic and family responsibility within them.
  • Target your weakness. Do you find yourself watching TV too much during the day? Did you ever stop to think that it might be because you're lonely and lacking stimulating conversation? Try listening to a book on CD while you're folding laundry instead. By looking at the reason behind the behavior that you want to change, you may be able to find an alternative and thus eliminate the problem altogether.

Wednesday, January 25, 2012

40 Questions To Ask Your Child On Date Night


I think it was daughter number five (I'm the second oldest of eight girls) who coined the term "Donut Date" to refer to when our Daddy would take one of us individually out on a "date" with him when I was young. It generally meant we were getting a donut or going to the grocery store for some root beer or another treat, which was a pretty big deal at the time. In fact, I still bug my Dad to take me on a date, except I hope it's to places like Disney World or a major music concert these days. ;-) Now, the tradition has moved on and I date my own three-year-old daughter. She gets terribly excited when I ask her if she wants to have a "mommy-daughter date". There are no arguments and she is on her best behavior while we go to the local coffee shop for a slice of carrot cake and juice! My favorite part, though? The conversation. My phone gets put away, no books are brought along, and we don't sit at a table with anyone else (though she has a way about her that attracts the elderly men to come over for a chat about her baby doll!). Instead, we chat. I ask questions, and we dream together over hot cocoa and cookies.

Dating your children is an easy and precious way to create beautiful moments for the two of you. Here are 40 Date Night questions to get you started:

1. What is the best dream you ever had, and why?


2. What is the worst dream you ever had, and why?


3. How do you like to be woken up in the morning?


4. What are the top five things you are good at doing?


5. What are the three occupations you would love to have when you grow up?


6. If you were to plan your own funeral, what would you want it to be like?


7. What are five activities you want to do within the next year?


8. Who is your best friend, and why?


9. What person can you not stand, and why?


10. What embarrasses you that I do?


11. What are you proud of that I do?


12. What makes you laugh?


13. What makes you cry?


14. What are the top three things I do that make you feel (not "know") loved?


15. What is the most important thing you have learned in life?


16. If you were to plan a sleepover, what would it include?


17. If you were to be one animal, what would you be and why?


18. What are your three favorite songs and why?


19. What one song can't you stand, and why?


20. What is your favorite movie, and why?


21. What are the top three reasons why you know you will be a good spouse/parent when you are grown?


22. What is your favorite physical feature about yourself and why?


23. What three things do you not like about yourself, and why?


24. When people compliment you, what is the top thing they say about you?


25. What are the top three compliments from others that you would like them to say about you?


26. What is your favorite Bible story and why?


27. What is your favorite Bible verse and why?


28. Who are your top two favorite historical characters and why?


29. In your life, what has been your proudest moment?


30. In your life, what has been your most embarrassing moment?


31. If you were to create your own job to earn money, what would you do and how would you do it?


32. If you were to create your own cake and own ice-cream sundae, what ingredients would you include?


33. What makes you feel safe?


34. What makes you feel scared?


35. What are two things that your friends or other people you know do that you don't like?


36. What are two things that your friends or other people you know do that you would also like to do?


37. Would you rather be a boy or a girl, and why?


38. If you could go anywhere in the world and do anything you wanted, where would you go and what would you do?


39. What school subject are you smartest in, and how do you know?


40. What school subject do you struggle the most in, and how do you know?

Friday, August 20, 2010

Apple Cranberry Walnut Fruit Crisp Recipe

I'm a big fan of fruit crisps since they're so easy and delicious. Here is my healthy rendition of a fruit crisp. Enjoy!

Apple Cranberry Walnut Fruit Crisp Recipe

Apple Cranberry Walnut Fruit Crisp
Prep: 30 Minutes
Bake: 30 minutes
Yield: 6 servings

Ingredients:
  • 5 cups sliced apples (unpeeled for extra fiber)
  • 1/4-1/2 cup dried cranberries
  • 1 cup regular rolled oats
  • 1 cup packed light brown sugar
  • 1/2 cup whole wheat flour (I use 1/4 C four and 1/4 C flaxseed meal for added nutritional benefit)
  • 1/2 teaspoon ground nutmeg
  • 1/2 teaspoon ground cinnamon
  • 1/2 cup butter, melted
  • 1/4-1/2 cup chopped walnuts
Directions:
  1. Place apples and cranberries  together in a 2-quart square baking dish.
  2. Combine all of the rest of the ingredients together to make the topping. Mixture will resemble coarse crumbs.
  3. Sprinkle this topping over the fruit.
  4. Bake in a 375f oven for 30-35 minutes or until the fruit is tender and the topping is golden.
Note: 1) This is great with vanilla icecream! 2) If you're like me, you want to double the topping portion. Don't. I already did it for you. :-)

Variation: if you're short on time, just use a can of pie filling in place of the fruit and put in the oven on your "broil" setting for a few minutes until bubbly and golden brown. Watch it--it won't take long to warm through!

Monday, March 15, 2010

CPSC Warning About Sling Carriers

On March 12, 2010, the U.S. Consumer Product Safety Commission (CPSC) released a statement advising people to "be cautious when using infant slings for babies younger than four months of age." They looked at reports involving deaths associated with sling-style infant carriers from the past 20 years and determined that slings can pose two different types of suffocation hazards:

1) Baby can suffocate from the fabric being pressed up against his or her nose and mouth

2) Baby can be asphyxiated from the neck bending the chin to the chest, restricting the airway

Two months ago, slings were added to the "list of durable infant products that require a mandatory standard" by the Commission (still undeveloped or in place). Interestingly, over the past 20 years, 14 deaths associated with a sling-style infant carrier were documented. Fourteen, and that puts slings on the warning list...

Until slings are a bit more regulated, the following safety recommendations has been given to parents regarding wearing a baby in a sling:


Now, I'm glad that there are regulations on children's products and that people are paying attention. With that said, though, I'm wondering what sort of slings have been causing these problems? I don't think it's fair to lump all slings into one category. For instance, after having my daughter, I put her into a commercial Wal-Mart bought sling (it was an Infantino brand, if you're wondering). The sling lasted for about 30 minutes until I couldn't stand it any longer--her neck was tucked in, I couldn't see her, and she couldn't possibly have been comfortable! My homemade ring-sling on the other hand is awesome--it lets me keep my child's head where I can see it, her body snug against mine, and safe as far as I can tell. As a careful parent, by golly, I want to know what sort of slings seem to be the problem!

I'm also wondering what was going on in these deaths that the parent didn't realize that the baby couldn't breathe. Weren't they able to see the face of their child? Doesn't everyone think to check that the airway can be maintained at ALL times? I'm pretty sure this is my mommy-instinct and not my paramedic training that causes me to think of these things. Now, I don't want any of my readers to become paranoid parents who don't let their child experience anything in life because it might be dangerous. I do want all of my readers and parents everywhere though to use common sense and keep their children safe.

Please, when using a sling or any baby carrying device (which you should do since studies show numerous benefits of babywearing!), be safe. Be smart. Don't rely on what a government or any other agency deems to be safe or appropriate, because as we know with a lot of the recalls lately, something that we think is safe may not be. Watch your child and always remember that whatever you place your child in is just an object--it's not going to call out to you if there's a problem!

My guidelines for slinging a baby:
1) Face must be unobstructed and visible at any time.
2) Head must be kept in-line or in a "sniffing" position with chest. This keeps an infant's airway open but not hyperextended.
3) Baby must be securely attached--I don't want to feel like she's going to fly away on me!
4) Baby must be in an upright position (head above bottom).
5) If nursing, head is OUT of the sling and I use the tail to create a modesty cover (which I can peak under).

*NOTE: I am not a sling-safety professional. This advice is purely my own and unresearched. I will not be held liable for any problems you have while wearing your child in a sling!*


Have you gotten your extra entries for the
Baby-Mama Shower starting in 17 days?

Thursday, March 11, 2010

Tips for Freezing Meals

Being a working mom doesn't leave me with much time to spend in my kitchen. On top of that, being pregnant doesn't leave me much energy for being in the kitchen! When I got online today and saw my "pregnancy ticker" was down to 111 days before Baby Monkey is due, though, the thought entered my head again about how very important it is that I get into my kitchen--and SOON!

When LoveBug was born, a friend from church organized hot meals to be brought to us for the first 5 days after we were home. It was awesome and a tremendous help for a new mama who wasn't up to juggling a newborn and a newly post-partum body while cooking! After that, I had a few meals in the freezer that I had previously put together and also some that my Mom had made for us. This experience with ready-to-go homemade meals has been heavy on my mind since getting pregnant again and realizing that not only will I have all of the normal "new mom and baby" things to deal with in July, but an active 20-month-old on top of it! Like it or not, I need to get my freezer stocked with meals within the next 16 weeks.

Freezing meals is an easy thing to do if you're already cooking and can save any mom a lot of time. Once you're actually in the kitchen, it's easy!
  • Double or triple whatever you're making for dinner, and freeze the extra
  • Freeze food in tin pans, covered in plastic wrap and foil
  • Don't want to use tin pans? Line your casserole dishes with foil before putting the food into it. Once the food is frozen, lift it all out by way of the foil and place it in a gallon freezer bag instead. When you're ready to use, just put the foiled food back into the casserole dish and bake!
  • Label everything with the name of the food, date it was made, and any special instructions
  • Stack by food type in the freezer (main dishes, side dishes, breads...or "chicken," "vegetarian," and "beef"!)
  • If you freeze in a glass dish, be sure to not place the cold glass in a hot oven when baking. You might end up with a broken dish!
  • Consider freezing meals in individual portion sizes so that you aren't stuck with a lot of leftovers when you use it.
Two other things that I do is always use ground turkey instead of ground beef and leave the frozen food as uncooked as possible so it is as fresh as possible when we thaw it.

Some of my favorite meals to double and freeze:
  • Macaroni and cheese
  • Baked Ziti
  • Meatloaf (mixed and frozen; cook through before serving)
  • 3 Bean Casserole
  • Chicken (stuffed with a cheese mixture, left in a marinade, etc.)
  • Quick breads (banana, apple, pumpkin, etc.)
  • Chili
To use, I just put it in my fridge to thaw for a day and then pop it in the oven to warm up or cook! Frozen veggies are a staple in our house and are cooked by steaming over a saucepan for a few minutes before seasoning and serving.

What are your tips and recipes for freezing meals? Leave them below and help me get some food in my freezer before this baby comes!

Thursday, March 4, 2010

Do YOU want to review products on your blog?

I'm often asked how it is that I'm able to review products on my blog. Frankly, this has been my best kept secret...until now! I love testing products, telling you about the products, giving companies suggestions for improvements, and, of course, receiving needed items for my family for only the cost of my time. The reason I started this blog was to provide a place of encouragement, support, and resources for working moms in particular. Soon after I began writing, though, my daughter needed the next size up in cloth diapers. We didn't really have the money to invest in new diapers so I thought to myself, why not use my blog as a way to provide for my child? The rest is history and I don't plan on stopping any time soon. :-)

This "product reviewing" part of the Building a Better Blog series will consist of a few posts. In its entirety, the following questions will be answered:

Preparing to review products
How to become a product reviewer
Ways to find companies and products
Conducting and writing a review
Troubles that come with reviewing products

Do you have more questions?
Leave me a comment below and I'll do my best to answer it!

Questions to Ask Yourself Before Making The Dive
Reviewing products may seem glamorous and get-rich-quick-ish, but it's really not a free way to get products for you and your family. In exchange for a product, whether it cost $3.00 or $300.00, you will be investing time--and potentially a lot of it! In my own experience and that I've read of other bloggers, I'd say that the overall average time spent on a review is 3 hours per review. If the average product would cost you $25.00 to buy, you're making $8.33 an hour. Keep this in mind before you decide to jump into the world of product reviews.

Given the value of time, you need to ask yourself the following questions before getting into reviewing:

1) How much time can I spend on reviewing products without taking time away from the most important things like my family, spirituality, health, and quality of life?

For some people, you may be able to devote 10 hours a week to reviewing products. For others, you may not be able to do more than 3. Be honest--it's better to start small and work up rather than build a poor reputation because you're not timely.

2) Who is my audience?

If you've read some of my other Building a Better Blog posts, you'll recall that in order to have a successful blog, you need to be focused in what you write about. If your target audience is people who like to cook and bake, you will want to write about food, not video games! As a reviewer, you need to maintain the same stability by choosing to review products that your readers are interested in, based on your target audience.  

3) What products can I provide an honest review for?

If you're to build a community of regular readers, you need to be focused in your reviewing just as you would your blog topics. On top of that, you should never agree to do a review that you can't really do. For instance, don't offer to review a baby's bottle unless you actually have a baby to test it out on! People are relying on your integrity and opinion of the product you're reviewing. If you can't really review the product, your readers will see that and they'll be less likely to look to your opinion in the future.

With that said, though, I do think that once you've proved to your audience that you can knowledgably review a particular sort of product, you then have more freedom later to review that same sort of product even if you can't "test" it completely anymore. For instance, if you've already reviewed baby bottle's while your infant used them, but then a few months after your child has weaned from a bottle, you have some freedom to still do a bottle review since you know what you're looking for and can compare features to other products.

4) What is my platform?

There are outlets for product reviewers who review through different means. Your platform may be a personal blog, friends, or a network that you've established in your community like play groups, PTA organizations, or church meetings. Think about what your platforms are and if they would be viable to a business as a good marketing opportunity. If you don't think there'd be much draw for a business to say "YES! I want this group of people to hear about my product!" then start working on ways to build your platform. A review without someone to listen is...well, not much of a review.

5) Why do I want to review products, anyway?

There's no wrong answer to this question, but you need to know what your motivation is in order to be successful. I'd love to see what other bloggers and people are motivated to review products by, so post your answer below! I'll start. :-)

Sunday, February 28, 2010

Using Cloth Diapers While Working Full Time

We began using cloth diapers on LoveBug before our stash of newborn sized disposables that people had given to us as gifts even ran out. It was a decision that I carefully researched and knew would be the BEST decision for the health of our baby and our sanity (who really wants stinky, oily diapers sitting in a can? Not to mention the cost...). Her grandmothers would be the primary caretakers of LoveBug during the day and when we mentioned using cloth diapers, we were met with a look of horror and a comment of "well, you can just buy disposables for me! I'm not using cloth!" from one of them. Yikes.

Day care and family providers both may show resistance to cloth diapering your child. On top of that, there are a lot of logistical factors to figure out when your child is watched outside of the home during the week. Here is a list of things that can help you make the transition to or maintaining your use of cloth while still working outside of the home:

1) Educate your provider. Instead of telling her that your child will be using cloth diapers, bring a diaper to show her when you approach the topic. Most people still envision prefolds, pins, and Gerber rubber pants when they think of cloth diapers! Showing them a ready-to-go, cute, and easy to use diaper may make the entire difference. It wasn't until my mother-in-law actually saw one of our pocket diapers that she decided she could try it.

2) Only send easy-to-use diapers with your child. The easiest diapers would be an all-in-one, sized diaper (not a one-size which requires more snapping), that uses aplix (Velcro) to keep it on. That way, your provider doesn't have to stuff anything, doesn't have to Snappi or pin anything, and doesn't have to try to remember which snap setting works best for your child. An AOI aplix diaper is as close to the convenience of putt on a disposable that you can get! If you want to keep using pockets or something (like we do), pre-assemble everything for the provider. Make it easy.

3) Be educated yourself. A provider may still have reservations if she doesn't know about the benefits or ease of cloth diapering. Bring a wet bag to show her about storage and come prepared with a list of benefits to using cloth. A little information can go a long way as long as you don't come across as rude!

4) Have a big wet bag on hand. If your child is going to need 7 diaper changes, your regular sized wet bag that holds 4 diapers may not do the trick. For any size, I recommend using a bag from Monkey Foot Designs. They're the best made bag I've used and come in a variety of prints and sizes. You certainly don't want a leaky bag or one that isn't big enough. Should your provider ever run out though, tell her to just use a plastic grocery bag for used diapers!

5) Consider using disposable liners. The Diaper Junction offers a variety of liners that you just lay on top of your diaper like usual, but then can throw into the toilet, taking any solids with it. Biodegradable and easy to use...and you won't have to deal with 8-hour-old poo.

6) Buy a diaper sprayer. There will be times where your dirty-diaper bag sits for a few days before you can get to them (embarrassing to admit, I know). In those moments, a diaper sprayer will make your life a lot easier. My top recommendation is the bumGenius Diaper Sprayer.

That's it! Continuing to cloth diaper while working is not only easy (with planning), but affordable, better for your baby, and better for the environment. More questions? Shoot me an email!

Friday, February 19, 2010

Tips For Making Your Own Baby Food


Making your own baby food is an inexpensive way to provide maximum nutrition for your child. Most people don't realize how easy it is to do, too! I first got into making our own baby food after reading the Super Baby Food book and after comparing it to the cost, ingredients, waste, and unappealing nature of jarred baby food, I am hooked. :-)

Items needed to make your own baby food:
  • Baby CubesTM 2 Oz. Baby Food Storage Contains no Phthalates, Bisphenol-A, PVCa blender
  • oven or steaming method
  • ice cube trays
  • something to store the food in like tin foil, freezer bags, or tupperware
Choosing your food:
Choose your food wisely. Things that freeze well are sweet potatoes, beans, broccoli, carrots, rice, pastas, applesauce, etc.. Things that don't freeze well are white potatoes, bananas, and celery (plus more that I'm just not aware of, I'm sure). If you can afford it, buy organic and local! This will reduce your risk of allergens, food diseases, and exposure to chemicals.

Preparing the food:
  • Wash fruits and vegetabls.
  • Prepare the fruit, vegetable, grain, or meat as you would normally. Baking or steaming is preferred as these will preserve more nutrients than microwaving, boiling, or sauteing.
  • Don't put any added fats, sugars, or dyes into the food. Keep things pure and natural!
  • Once food is soft, put some liquid (mama's milk is best!) into the bottom of your blender and then add chunks of the soft food on top. Liquids to consider would be breast milk, formula, water, or diluted 100% fruit juice. Be sure to only use enough liquid to get the food to blend properly.
  • Poor or scoop the now pureed food into ice cube trays, and pop into the freezer with a sheet of wax paper sitting lightly on top to reduce any freezer burn.
  • Once things are frozen (around an hour or two, depending on the temperature of the food and freezer), pop the cubes out and put them in a sealed container (or wrapped in foil) for storage. Be sure to write the contents and date of the food on the package!
Eating the food
  • Ideally, take however many cubes your baby will eat out of the freezer and let them thaw in the fridge over night. Otherwise, thaw them in any method you choose.
  • Once it's unthawed, mix fresh mama's milk, formula, water, or diluted 100% fruit juice with the food until you achieve your desired consitency. Why not do this before freezing? Because then you'll take up more freezer space (the cubes are denser when containing more food and less liquid), and you will also be able to adjust the food to the consistency your baby needs as time goes on (a 6-monther will need a smoother and thinner consistency than a 9-monther will).
  • Warm on stove, in oven, or microwave (least desireable). Be sure to stir well and test the temperature before feeding to your baby!
  • Note that most food stored properly in a deep freezer will keep for up to one year.
Thoughts on making your own baby food
LoveBug always enjoyed our "home made" food better than out of a jar--and I don't blame her! It's much tastier, is more pleasing aromatically and aesthetically, and fresh! Many people are turned off by the thought of making their own food because they think it'll take a lot of time. Honestly, it really doesn't. I cooked three large sweet potatoes in the oven (5 minutes for washing, poking holes, putting in the oven, and then taking them out later), mixed them all in the blender at the same time (another 5 minutes?), froze them, and stored them. This all took less physical time for me than a trip to the grocery store, and I didn't have a zillion little glass jars to clean out when we were all done. :-) You'll be surprised at how LONG three sweet potatoes will last for a baby!

The key is to make a lot at once. A few potatoes, a head of broccoli, or a pot of rice. A little goes a long way for babies, and even making food once a month will last for the entire month. If you don't have enough ice cube trays (which you probably don't), just store the food in the fridge as you get through freezing everything. The effort put into this should be less than it takes to go to the store, and the peace of mind you'll have knowing that you're providing better and cheaper food for your baby can't be beat!

Upcoming this week: reviews of SAFE eating products for babies and toddlers!
We'll visit companies like Zak!, bambu KIDS, and more

Monday, January 18, 2010

A Baby's Guide to Mom Returning to Work


One of the feelings I struggled with the most when returning to work after LoveBug was born was the lack of control I now had in my child's life. Even though I would ask certain things of her caregivers (always a family member), the truth was that the caregiver was going to do whatever she was going to do and I wouldn't be there to stop her. Most of the time, everything was okay...but there were a few times when my will was deliberately went against or I was left out of the loop by a lack of communication.

As Mommies, we need to remember that we are the best person for our child. It doesn't matter if we aren't the ones who can be with our babies every day. We are still our baby's mommy. Over the last year, I have learned that something as simple as packing the diaper bag differently each day can help give me back my rightful sense of control. I may not be there to protect my child, but darnit, I will do everything within my power to provide my child with the best experience possible and to know everything I can about her day!

Here are some things that I add to our bag to ease the transition and enhance the communication for both baby and myself:

1) Photo of mommy and daddy. LoveBug has been able to recognize her mommy and daddy through photos since she was very young. Part of her daily routine at Mimi's house now is to find our wedding photo, point to her Ma and her Da, and give us kisses! Now do I know that this actually helps her bonding with us? Nope, I don't have any idea if it helps in any way...but it sure does make me feel better, and I wouldn't be at all surprised if she likes knowing that she can see me at any time of the day that she wants to. This gives HER a sense of control!

2) Mama's milk. It makes me feel a whole lot better knowing I'm providing the ultimate nutrition for my child, and I know that she prefers the taste over anything else (at least until she was about 1-year-old. Now she drinks other things during the day and doesn't use a bottle). Being able to still give my child something so precious to both of us even when I can't be with her is amazing!

3) Cloth diapers. I like to use CD's for so many reasons, but for this particular blog entry, I like to use them because then I know exactly how many diaper changes she had during the day. Using CD's also tells me how much urine she excreted (by how saturated the diaper inserts are), and the consistency and frequency of any bowel movements (even though these are dumped out before the diapers are given back).

4) Something that smells like mom. When LoveBug was very young, I'd send a worn shirt for her to snuggle against while she was sleeping. There IS research to back up the whole mom-baby scent thing. :-) It helps the bonding process, and also relaxes the baby more when sleeping. Now that LoveBug is older, she doesn't need a shirt anymore, but I will let her take something of mine with her if she grabs it and puts it into her bag.

5) A keep-track notebook. I've seen commercial versions of these, but the idea is simple enough for you to make yourself. The idea is to create a place for the caregiver to write down details of your baby's day as well as any notes for you about questions, concerns, special moments, or upcoming events. You could use a blank notebook and just write the day's date at the top of the page, or better yet, create your own template and put it into a three-ring binder.

The template can break the day down by time (LH column) and add event icons across the top of the page (like a bottle, a diaper, a crib for napping, a toy for playing, etc.). Then, the caregiver can simply check the boxes as appropriate throughout the day, or write details (like "bm" in the diaper box if your child had a stool). You'll be able to quickly tell how many diapers your baby went through and for how long she napped. Another idea is to put the icons on the LH side of the page (in a column going down) and have the caregiver write the times in boxes across the paper horizontally along with any pertinent notes.

However you choose to do it, having a written record of your baby's day will make your life easier. It's difficult to rely on someone's memory to recall what your child ate, how much, and when. I also find it's hard for me to remember to ask about every detail...until I'm home and my child throws up...then I am immediately wondering what happened during the day!

6) Contact information. Including a luggage tag with your child's and your information on both the diaper bag and car seat is a great idea just in case of an emergency. Be sure to limit your child's information to only what's necessary (who wants a creepy stalker knowing these things?). Your tag may look like this:

Name: LoveBug; DOB 10/2008
Mother and Father: Rachel and Ron
H: (555) 555-5555; W: (555) 555-5551
Allergies/Medications/Medical History: none

Being a paramedic, how great it would be to have this information readily available every time I showed up to a car accident where there's a kid in a car seat and the parent is unconscious or taken away in a separate vehicle!

Thursday, December 31, 2009

Enfamil Court Case--are you a wise consumer?

As 2010 approaches (quickly, I might add), I know that many peoples' "resolutions" involve finances. Unfortunately, unless you have the right resources and time to research products, prices, and campaigns before you buy an item, many people fall into the trap of trusting a store or advertising campaign a little too much. This was recently brought to my attention by Mom Select (BSM Media) when they sent me an email about an Enfamil formula court case.

Apparently, the makers of Enfamil "engaged in false and misleading campaigns against PBM’s competing store-brand of infant formulas, suggesting they do not provide the same nutrition as Mead Johnson’s brands." PBM Products, LLC, is a leading company that provides store-brand infant formulas to stores like Target, Walmart, Sam's Club, and Walgreens among others. Their false advertising involved direct mailings to parents insinuating that unless you were using Enfamil (as opposed to other formulas), your child would not be receiving adequate nutrition and would have developmental problems. Yikes! A full press release of the case and verdict is available here.

Dr. Brown's BPA Free Polypropylene Natural Flow Bottle Newborn Feeding SetThe truth is that the nutritive content of both Enfamil and PBM formulas is the same. Of course, neither even remotely compares to the nutrients and benefits of human breast milk, but paying 50% more for one type of formula over the other gives you no benefit.

How many people blindly followed that false advertising and decided to buy Enfamil instead of PBM as a result? I would imagine that a lot of people probably don't pick up comparable products and read every single ingredient and nutrition information to determine which item to buy. I do, but that's also why it takes me a year to go grocery shopping when I have to buy something new.

The same philosophy of being a smart consumer applies to a lot more than infant formula, though. My family receives WIC--a supplemental food program that provides specific food items to infants and pregnant or breastfeeding women. One of the food items is jarred baby food (which I, of course, would NOT buy on my own since I firmly believe you can provide your child with better, more natural nutrition by preparing your own baby food). You are given the choice between Gerber and Beech Nut, but are limited to the jars with only single food items and without any additions (including DHA or an "organic" label). What have I found out? Beech Nut products are better! They contain less additives than Gerber, but who would have thought unless you took the time to compare? Everyone knows the Gerber baby, so that's the jar most people reach for first. Remember, product recognition means nothing more than a good advertising campaign. It does NOT mean a good product.


Nutrition isn't the only reason to compare, though. It's ingrained in a lot of us that buying in bulk will save you money overall. Did you ever take the time to calculate the ounce for ounce savings, though? Most of the time, you won't need to because grocery stores will put the total price and also the price per ounce, pound, or count on the shelf's label. Take a moment to compare the price per ounce (or other method), and you'll find that buying the larger box of cereal or bigger bag of sugar does not always equal savings! Surprising, I know.

My point in sharing this information with you is to encourage you to take the extra few minutes to really know why you're buying an item. If you want to save money and live healthier in the New Year, this is one practical way to do that!

Wednesday, December 9, 2009

Rachel's Guide To a Low-Stress and Cheap (or FREE) Christmas!

My life is busy. I normally work a 37.5 hour week (plus meetings), but often pull a 50-hour-week by working an ambulance shift on the weekend. Tying that with having to pick up my beautiful daughter after work, rushing home to make dinner (or baking a frozen pizza), getting ready for the night and tomorrow--it's all I can do to just get into bed!

I often help the extra-business that comes with Christmas by doing my shopping throughout the year and particularly during the AFTER-Christmas sales. I have a cupboard where my gifts are organized by the type of gift (wedding, baby, adult Christmas, kid's Christmas...) along with organized wrappings (either bought on sale or recycled from gifts I myself have received!). This makes gift giving during this time of year pretty easy and stress free--and I get to avoid the overcrowded shopping malls which I so intensely despise!

This year, though...a little different. My cupboard is not as full, probably due to having a little one and thus less money and less time to snag deals up throughout the year. I'm finding that I'm spending more than usual (on a CREDIT CARD nonetheless, which is a huge no-no in our book!), and have had to find new ways to give nice gifts without making myself homeless or missing work to go shopping. If you're in the same boat, you might find the following options good ones as well!

What are your other ideas for having a low-stress and frugal Christmas? I need some birthday and baby shower gift ideas, too, so send them my way!

#1 Gifts in a Jar http://www.craftbits.com/gifts-in-a-jar
While you can buy some fantastic books with instructions, photos, and cards to attach for your Gifts in a Jar, this website provides a variety of recipes for food, drinks, bath products, and other things to make. Gifts in a Jar are easy to make, great for everyone, and quick to spruce up by adding some fabric and ribbons to the lid! My idea is to make "breakfast gift baskets" for family this year with mugs that I bought on discount during the summer and Gifts-in-a-Jar for pancakes, muffins, and hot cocoa!

#2 Discounts and freebies. My favorites this season are:


Fashion Playtes; this website allows girls to design their own clothing--and then have it mailed to them! It's so fun that I actually designed a shirt myself...now if only it would fit! I used the code


ONE20 for $20.00 off a $35.00 gift certificate. The only catch with the gift certificate is that you have to have a minimum of $35.00 to use the $20.00-off code and it has to be your first purchase.


Jillian's Drawers is a natural parenting store that's currently having a 12-Days-of-Christmas sale. I didn't know about it until day 3 (I think it's day 5 now?), but I snagged a bunch of diaper inserts for 50% off as soon as I found out! Each day, they're choosing different items to discount. They aren't always 50% off, but there's a lot of great products coming up and they'll hold out shipping your items until the end of the sale so you can combine your orders from each day if you ask them to!

Holey Donuts; first, if you didn't already enter my contest for Holey Donuts, then you need to--and QUICK because it will be ending soon (includes a bunch of pastries AND $150.00). Next, you should educate yourself about this company because it's genius, very tasty, and an awesome gift for, well, most everyone I know! This company makes low fat donuts and cinnamon buns with no artificial sweeteners and then ships them frozen to your door step! I've had the pleasure of trying these pastries and they are delicious enough that my husband has eaten them all while I'm at work. :-\ Seriously, they taste great and you don't have any guilt from eating them. They're constantly having fabulous sales, have a "box of the month" club you can buy, and will also hold off on shipping until Christmas-ish time. Here's the most current promotion:

buy 3 assortments, get $7 off code= LF7
buy 4 assortments, get $10 off code= LF10
buy 5, get FREE SHIPPING code= 5FRSH ... 5 box maximum order

Remember to hit "recalculate" after you enter your discount code

#3 Giveaways with few entries. I may be ruining my chances to win by sharing this with you, but here are some good options:

Caching Family Blog is holding a contest for a $30.00 gift certificate to TurtleTurtle. It ends on Saturday and so far, no one has entered (until I do in a moment!). Awesome for anyone who is pregnant or has a little one!

My Contests. I can't enter them, so please do enter away. :-) They aren't inundated with people, so your chances are excellent to win something at this point!

Prizey is a collaboration of blog giveaways and contests. I submit my listings there, and wish I had lots of time to spend entering other contests I find there! I could drool over a lot of the stuff that someone's going to win...

Wednesday, December 2, 2009

How to Make A Ring Sling

Interested in sewing your own Ring Sling? Retailing for anywhere between $30-$130, making your own can be a great way to save money and make sure you get what you want! I initially began making ring slings as a way to save money for myself, and fell so much in love that this is now a popular baby shower gift that I give. Follow these free photo and written instructions to make your own! Comments and suggestions are welcome. :-)
Photo Instructions for Making a Ring Sling
Measure the baby-wearer from the right shoulder to the left hip. Triple this measurement and add 8 inches to find how much fabric you'll need. Buy two complimentary fabrics in this length. So if I'm 22"...
22 x 3 = 66

66 + 8 = 74" of fabric needed


Wash, dry, and iron your fabric.


Trim the width of both pieces to 33" (or 22" for a preemie sling)


Sew the fabrics wrong right sides together on both long sides and also one of the short ends.


Turn fabric right side out (it should make a big sleeping bag).


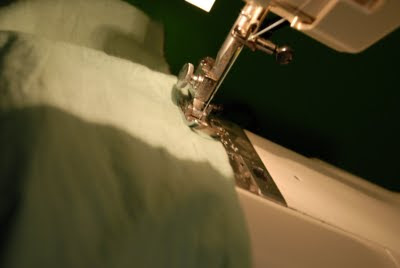
Iron the fabric around the edges so that it lays flat, then sew 1/2" along both long ends and the short end that you already sewed together. This will keep the fabric from rolling into itself.


Now comes the tricky part. Be sure to take your time with this part or you'll be in trouble!


Fold the unhemmed short edge of the fabric down 1/2" and iron. I like to fold down the "outside" fabric, as shown below.


Fold the same part of the fabric you're already working with down 5" and press.


Open the 5" fold and place both rings with the left hand corner of the fabric inside.


Fold the corner through the rings so that the 1/2" pressed line meets the 5" pressed line.


Ever so carefully, stitch a few inches at a time of the 1/2" pressed edge to the 5" edge.
Note: I reinforced both ends of my stitching with a backstitch to add more security.


Keep matching the pressed edges and sewing.

The finished product should look like this:


You're finished! Check the length of your sling, fold up and stitch into place any excess. This can either form a pocket or just add a nice thicker tail that's great for wiping up any messes. I also like the contrast it creates to have the opposite fabric against the front fabric.


A note about materials used in making a Ring Sling:
I suggest only using fabrics that are 100% of a particular material. Mixed fibers tend to stretch more (do NOT buy a stretchy fabric as it will not be safe!), and are also less fire resistant.
The rings that I use to make my slings are purchased from www.slingrings.com. They have undergone rigorous safety testing and come in a variety of beautiful colors. One can use aluminum or nylon rings, but I will only use the metal kind as I have more faith in them and like to use as little plastic as possible anyway. The great thing about Sling Rings is that the colors won't wear off, and they're safe for babies to chew on, too! Don't purchase rings from craft stores--you won't know how safe they are or are not.
When choosing the appropriate sized ring to make your sling, I recommend using the "medium" size from Sling Rings. I've used both the small size for a single fabric sling, and the medium ones for a double fabric sling such as what these instructions are for. The medium size is more comfortable, provides security, and allows for easy adjusting.
A big thanks to www.slingmemommy.com ! They are where I first found directions to make my ring sling. The directions in this tutorial are based off of theirs which can be located for free on their website.

Friday, August 21, 2009

Understanding UV Rays


Ultraviolet (UV) radiation is a form of light. The spectrum of colors that allow us to see things is actually dependent upon how long or short a wave length the light for that color is. The shorter the length, the bluer the color, with violet being the shortest color that humans can see. Hence the name "ultraviolet" when referring to light that we can't perceive with our eyes. We are able to sense UV rays in other forms though, such as heat and also the effects that it can leave us with such as a burn. UV radiation is an electromagnetic wave which is shorter than visible light but longer than an X-ray wave. It's amazing to me how powerful something that we can't see really is! Did you know that the government actually forecasts the UV intensity like a regular weather forecast? Knowing the UV intensity of the area you live in on a particular day can help you decide how much protection you'll need from the sun. The following gadget and information can be found at http://www.epa.gov/.


1-2 LOW
You can safely enjoy being outside. Wear sunglasses on bright days. If you burn easily, cover up and use sunscreen SPF 15+.
In winter, reflection off snow can nearly double UV strength.


3-5 MODERATE
Take precautions if you will be outside, such as wearing a hat and sunglasses and using sunscreen SPF 15+. Reduce your exposure to the sun's most intense UV radiation by seeking shade during midday hours.

6-7 HIGH
Protection against sun damage is needed. Wear a wide-brimmed hat and sunglasses, use sunscreen SPF 15+ and wear a long-sleeved shirt and pants when practical. Reduce your exposure to the sun's most intense UV radiation by seeking shade during midday hours.

8-10 VERY HIGH
Protection against sun damage is needed. If you need to be outside during midday hours between 10 a.m. and 4 p.m., take steps to reduce sun exposure. A shirt, hat and sunscreen are a must, and be sure you seek shade.
Beachgoers should know that white sand and other bright surfaces reflect UV and can double UV exposure.

11+ EXTREME
Protection against sun damage is needed. If you need to be outside during midday hours between 10 a.m. and 4 p.m., take steps to reduce sun exposure. A shirt, hat and sunscreen are a must, and be sure you seek shade.
Beachgoers should know that white sand and other bright surfaces reflect UV and can double UV exposure.


Skin Cancer Facts


The following information is taken directly from the UV Skinz website at http://www.uvskinz.com/8facts.aspx . Take the time to read it--you may read something that will save your life. Enter to win your own piece of UVP clothing from UV Skinz here! Earn an extra entry in the contest by sharing another fact about UV rays or skin cancer here (different than the ones in this blog post) and then mentioning that you commented here on the actual contest post. Contest ends 9/03/09 at noon, EST.

1. More than 90% of skin cancer is caused by sun exposure.
The UV rays of the sun are responsible for non-melanoma skin cancers. Unprotected exposure to these rays can be from being outdoors, tanning booths, and even through your car or home windows.

2. Each hour, 1 person dies from skin cancer.
About 2,800 people will die of non-melanoma skin cancer and about 8,000 will die of melanoma in the U.S. this year. The sad thing is that many of these deaths could have been prevented by simply protecting ones self from the sun.

3. Skin cancer accounts for more than 50% of all cancers combined.
Skin cancer is the most commonly diagnosed type of cancer among men and women.

4. More than one million cases of skin cancer will be diagnosed this year.
The American Cancer Society estimates that 1.5 million cases of skin cancer will be diagnosed this year.

5. Skin cancer is most deadly for African Americans, Asians, and Latinos.
Although the risk factor is rather low for African Americans, Asians, and Latinos, skin cancer can be the most deadly for these groups.


6. 1 in 3 Caucasians will be diagnosed with skin cancer sometime in their life.
1 in 5 Americans will be diagnosed in their lifetime with skin cancer. The risk factor is higher for Caucasians, with it being in 1 in 3.


7. One bad burn in childhood doubles the risk factor for melanoma later in life.
Protecting children against UV exposure is essential for skin health into adulthood. A blistering sun burn during childhood increases the risk of melanoma as an adult. Melanoma is the deadliest form of skin cancer.

8. Men are diagnosed with skin cancer more often than women.
According to the American Cancer Society, men are twice as likely to develop skin cancer over women. In fact, it is more common than prostate cancer, lung cancer, and colon cancer in men over 50. This makes skin cancer the most common cancer in men over 50.

Tuesday, July 21, 2009

Permanent Water-Guard Review & Giveaway


*NOTE: the original post, entitled "Silicone Water-Guard Review & Giveaway mistakenly identified the object for review/giveaway as the Silicone Water-Guard when it should have been for the Permanent Water-Guard. Corrections were made on 8/05/09.*

Let's be honest: sometimes, even when diapers are stripped, they still leak. We've had this problem with used FuzziBunz that we've bought offline in particular. I can't rag on the FuzziBunz company for this since I have no idea how the diapers were previously cared for. The fact remains though. They leak.

I'm sure that many other parents out there have experienced the same phenomenon, and so you'll be quite excited about what I'm going to tell you next: there is a solution. You know Atsko, the company that makes Sensi-Clean? Well, they also make Permanent Water-Guard. The concept is pretty simple:
It comes in a spray can. You clean whatever you need to waterproof. You spray the spray on whatever needs to be waterproofed. You let dry. The item is now waterproof. The end.
Permanent Water Guard comes in two different types--a 17 fl. oz. Trigger Spray for "natural obsorbent materials" (cotton, wool, down, etc.) and a 10 oz Aersol spray (this is the one I tested) for "synthetic materials and blends" (polyester, micrfibers, fleece, waterproof breathables, etc.).

Here's what Atsko says about their Permanent Water-Guard:

Permanent Water-Guard is a solvent free, water-based fluorocarbon polymer water and stain repellent. It dries odor free and without U-V brighteners.
Guaranteed to remain effective even after 25 washings in Sport-Wash or Sensi-Clean. This is an extraordinary claim no other product is willing to make -- not even factory-applied Durable Water Repellents.


And the best news of all for us is that it re-waterproofs pocket diapers while keeping everything else the same. I love it! You don't need to throw those old diapers out (or pass them on to an unsuspecting mama over the Internet...) any longer. Simply wash your diapers, turn them inside out, stretch them (so that it all gets coated) while you spray the "wrong side" of the PUL layer (the shiny side), and then let it dry. I did all of our diapers at one time outside on a sunny day. It worked so well that I pulled all of our old diapers out of storage (waiting for the next baby) and sprayed them before packing them up again.

The aeresol spray cost $9.15 on their website (trigger spray is $15.70) and will last a long time if you're using it just for diapers. In fact, I think one can may last me my entire diapering career. Being an active outdoor enthusiast though, I'm pretty excited to have a quality product that I can use to re-waterproof my camping gear. There's nothing worse then waking up in a puddle!
*Buy this product (everyone using CD's should have Sensi-Clean and Permanent Water-Guard on hand) at Atsko's website, http://www.atsko.com/

*Win it! Atsko's giving one of my readers a can of Permanent Water-Guard for FREE. All you have to do is leave me a message and tell me that you want it! Be sure to include an email address and enter by August 7, 1530 hours, EST. Also, leave a separate comment for each entry.
Earn additional entries by...
*Entering one of my other contests (one entry per contest)
*Sporting my buttons (one per button)
*Subscribing to me or following me
*Emailing some friends with "lifemoresimply(@)yahoo.com" CC'd in
*Otherwise spreading the word. Just tell me what you did!

Monday, July 20, 2009

How To Strip Diapers


Cloth diapers are not meant to be stinky or leaky. If they are, then you probably have a buildup of soap, fabric softener, or some other substance that's causing them to retain odors and leak fluids. You can avoid this problem by not using certain detergents, not using any fabric softeners, doing an extra rinse after washing your diapers, and only using particular diaper creams.


What to do if your diaper start to smell or leak, though? Strip the diapers. The term "stripping" is simply meant to refer to a process of removing any build up that may be on your diapers (soap, usually). It's a very easy thing to do--we regularly strip our diapers, and always strip any used ones that we buy before putting them on Amara.


Here are the different ways to strip diapers:

1) Run the diapers on a hot-cold wash cycle but with no soap. Look for suds when they're agitating. Continue this process until there are no suds.


2) Use 1/2 cup white vinegar in the rinse cycle when washing diapers. This reacts with soap, causing it to dissipate. Don't worry, your diapers won't smell like vinegar when they're dry. You can also try adding 1/2 cup of baking soda to the wash cycle with or without a little bit of tea tree oil. It does the same thing as the vinegar. The tea tree oil works to disinfect the diapers and also works against fungi (great if you're suffering from a yeast rash!)


3) Soak diapers in a hot water/dawn dish soap mixture for 30 minutes, and then scrub away with a tooth brush. This is particularly effective with fleece pocket diapers. Wash as usual before and after, and by golly, make sure that there is no soap left in the diaper!


4) Use a stripping agent. This is my favorite method since it's easy and takes no extra time. Bac-Out, Calgon, Dawn Dish Soap, OxiClean, and Sensi-Clean are all additives that I've seen recommended for stripping diapers. You'd simply add the agent in with your diapers when washing them (instead of a detergent), and then make sure the product rinses completely out (no bubbles during agitation!). We regularly use Sensi-Clean to strip our diapers. Any time that we think they're getting leaky or just need an extra good washing, we just use Sensi-Clean in place of our regular detergent. The key to these agents is that they're supposed to remove all residue that may be lingering on clothing. Be careful, though. A handful of these are known to cause rashes on some babies.


Still having problems? You may need to strip your washing machine. Believe it or not, soaps can build up on your machine walls, and fabric softener can build up on your dryer walls. To strip a washing machine, simply run a load on hot with Sensi-Clean (or another stripping agent). Put a few towels in to aid the process. Some people opt to run an empty load, though. You may need to do this a few times depending on your build up.


The Diaper Hyena suggests this baking soda-vinegar method of stripping a washing machine:


Loosening the grunge and grime. Starting with an empty washing machine, run HOT water up to the highest washing level your washer offers. When the water is full and the washer begins agitating, add 3 cups of distilled white vinegar (2 cups of lemon juice can be substituted) and 1/2 cup of baking soda to the water. Allow the cycle to run almost completely, advancing it to 'spin' right as the water starts to drain. By doing this, the washer will spin and drain at the same time. Follow by wiping down the inner tub, removing any residue that has been loosened by the cleansing process. To remove all remaining residue, follow this with a complete COLD water cycle. Adjust your washer's agitation to high (where you would place it for heavily soiled clothing). This technique should remedy any lingering soap scum or mineral deposits both in the drums of your washing machine and the hoses.


Any way you do it, it's a good idea to strip your diapers and washing machine every few months as maintenance, and any time needed in between. It'll prolong the life of your diapers, and make your life a bit easier and happier! Do you know of any other methods for stripping diapers?